
Tip #7: Personalizing Your Membership Site’s Email Notifications
 June 7, 2014
  0 Comments
When a new member is registered to your membership site he gets a welcoming email with basic information and his login details.
After working with many Wishlist Member users, I have noticed that many of them don’t really pay too much attention to the message sent after the registration and just leave it at the default.
However, personalizing your email notifications can have a major effect on your members’ engagement, email confirmation rates and retention rates.
Continue reading this tip if you want to know more about personalizing your email notifications to your members easily.
Types of Emails Sent
There are several types of emails sent through Wishlist Member:
- Registration email
- Lost information
- New member notification
- Unsubscribing email for members who cancel their subscription
- Registration email confirmation
- Require admin approval
- Admin approval notification
- Incomplete registration notification
- Expiring member notification
- Password hint notification
All emails already have default information inside, so you don’t really need to start thinking about what to write in them.
However, the one email I would recommend you to change, or more precisely, to personalize, is the registration email.
How to Personalize Your Emails?
Besides the default information inside each email (according to the type of email) I would recommend you to add some information that is relevant to your specific membership site.
For example, if you offer a free gift for members who register to your membership, you can add a sentence like this: “To get your free gift please go to the members’ area using the link below”.
You can also change the title, include a welcoming message, important links or any other type of information you think is important.
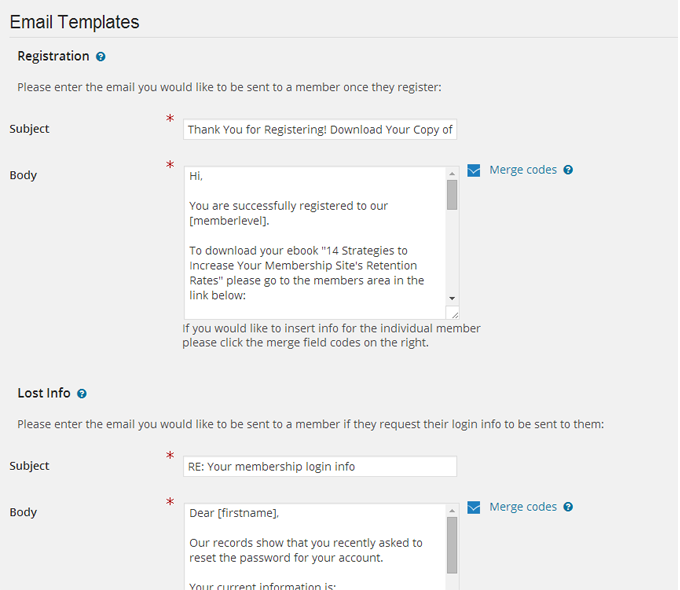
You can also use Wishlist Member shortcodes that appear besides every email template to make it even more personal.
Changing the Email Information
Changing the information in each of the emails is possible and can easily be done.
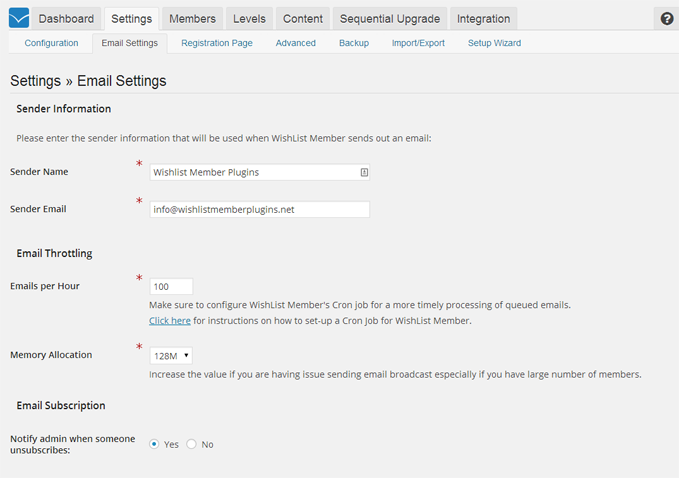
To change the information go to Wishlist Member menu > Settings > Email Settings
Right below you will see the sender information which you can change.
Also, you will see the email templates.
Screenshots:
Liked This Tip?
Continue reading our other tips and enhance your membership site even more:
- Tip #1 – Switching from Wishlist’s Old Registration Form to the New One
- Tip #2 – Managing Your Membership Site Easily Using These Wishlist Member Shortcuts
- Tip #3 – Must Have Plugins for Managing Your Membership Site
- Tip #4 – 3 Components to Creating a Killer Error Page to Increase Your Revenues
- Tip #5 – Creating Membership Bundles with Wishlist Member
- Tip #6 – One Simple Trick to Preventing Duplicate and Incomplete Registrations

 “Just wanted to let you know that the plugin is working great and incomplete registrations have gone to zero! I’m definitely going to do a review of the plugin and get it for my own site.” MaAnna Stephenson BlogAid.net
 “Bob Tolbert’s Wish List Member plugins have made life easier on us by automating processes that would normally eat up a ton of admin time. I especially appreciate Bob’s quick response time and customer service. Fact is, our membership website would not function without these plug ins.” Michael Burwell TheHangoutHelper.com
 “This plugin is the best way to supercharge your membership signups. I was especially impressed by the developers prompt customer service!” Stan Smith PushingSocial.com
 “The Wishlist Auto Registration plugin is really great, I love it! And the support you guy’s deliver are really outstanding! Thank you so much!” Johan Skalberg kalisikaran.info


No comments yet... Be the first to leave a reply!